|
I've finally come around to making this blog post about the new changes in the physically-based camera system in LipsEngine. As you might remember from my last post about this topic I was trying to simulate how a real camera works by using real-world parameters like shutter speed, ISO or aperture. However the issue with that previous approach was that even though I was using real-world parameters as an input. The calculations weren't done physically correct or based on anything but empirically choosen values that "fit" the output of a real camera. Which meant lots of random magical numbers and after all the end result wasn't that great. The new implementation calculates the CoC size based on real camera values which is much nicer. Another thing that I decided to change was the fact that I used the shutter speed, ISO & aperture to calculate the amount of exposure of the image had. At first it sounds plausible because that's how it works in real world cameras on manual setting but after working with it for a while I decided against it. The reason is that I just found it very unintuitive in a virtual simulation (3D-Engine) setting and opted for a more simple solution to have the regular auto-exposure via averaging luminance of the last few frames on plus a setting to manually shift the exposure in both directions if needed. In my previous Depth of Field implementation I used an approach that extracted bright pixels depending on luminance and CoC size and added them to an append/consume structure, which I then rendered as bokeh sprites via geometry shader point-quad expansion. And the blur was then accomplished using a large pseudo separable disc blur. You can find more on that technique here: https://mynameismjp.wordpress.com/2011/02/28/bokeh/ What I didn't quite like about the technique was that the bokeh shape always felt disconnected to the blur and I was having a hard time finding a setting that looked good to me. Since we can't go crazy on the disc blur size and the already very expansive bokeh sprite rendering pass is a huge performance hog with potentially tremendous amounts of overdraw. And we all know geometry shaders are a delicate thing when it comes to outputting huge amount of objects... So, the new technique is a scatter-as-gather approach similar to what can be found in UnrealEngine 4. It makes use of a very clever way of rendering bokeh, namely using multiple box filter blur that are skewing into a certain direction to shape the image into a hexagon. This works very efficiently because the blur itself isn't that expansive and we now have a blur that is actually shaped like the aperture just like it would in real life cameras. Another thing is that since the bokeh shape appears in form of our blur, we can avoid having to draw them as extra sprites on top of it so the issue of overdraw is none existent in comparison to the previous technique. To further increase the performance I'm also downsampling to 1/2 Resolution during the box blurs using a gaussian filter to smooth out the transition between blurred (half res) and unblurred (full res) regions. Here are a few pictures of it in action: f/22 @ 210mm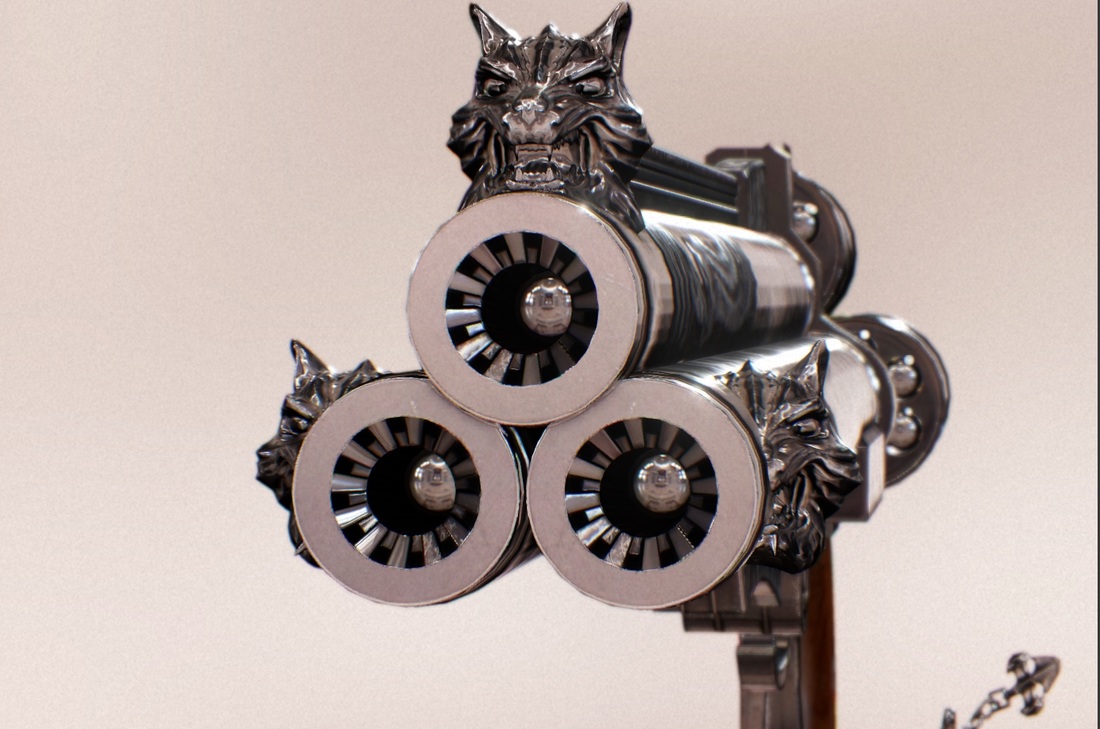 f/5.6 @ 210mm  f/1.4 @ 210mm (little out of focus) 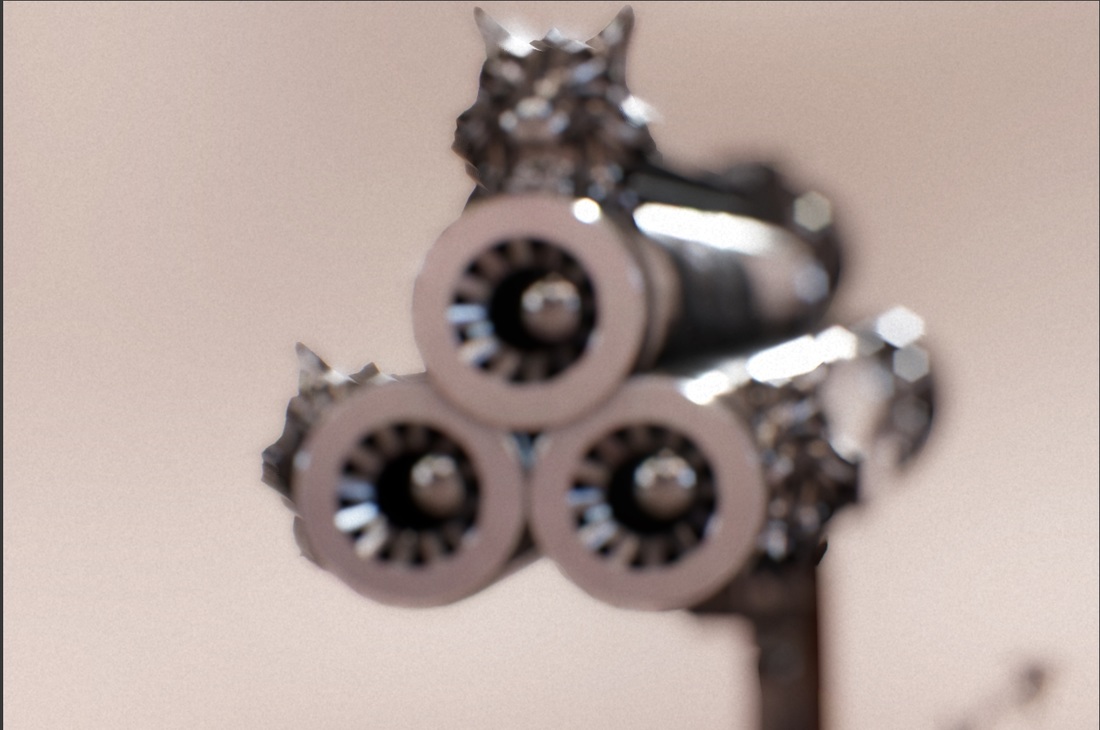 f/1.4 @ 210mm (changing focus to make it completely out of focus) 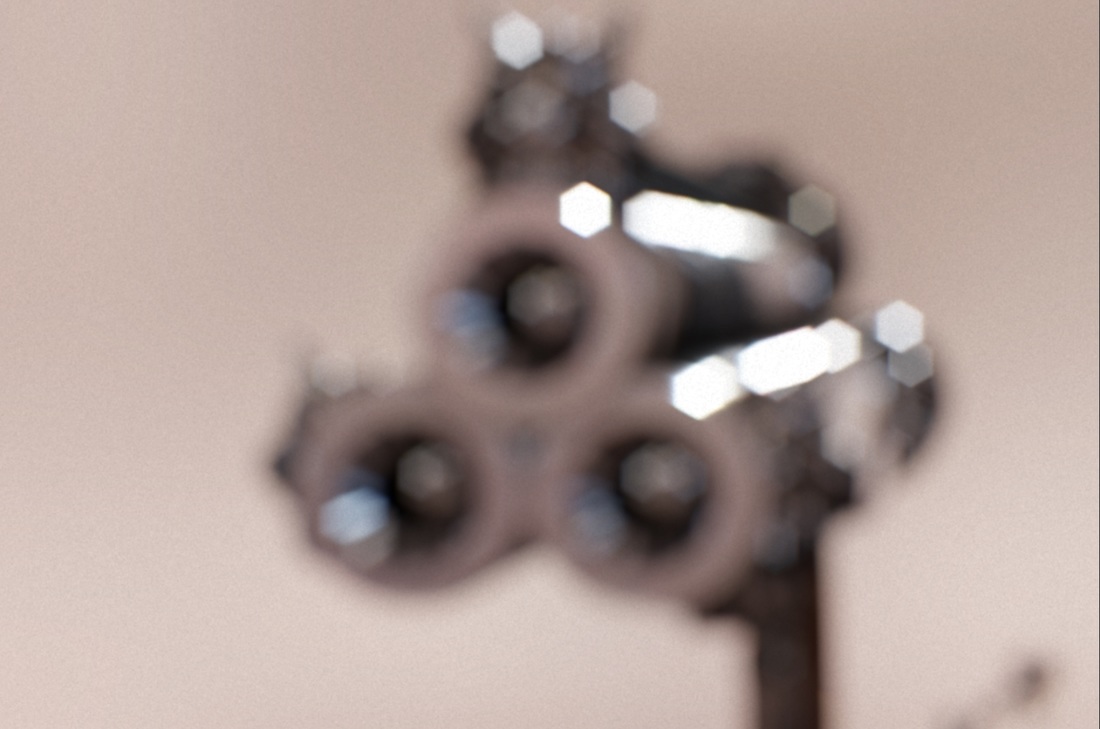 f/1.4 @ 210mm (focus on the back of the gun + higher ISO for more image grain) 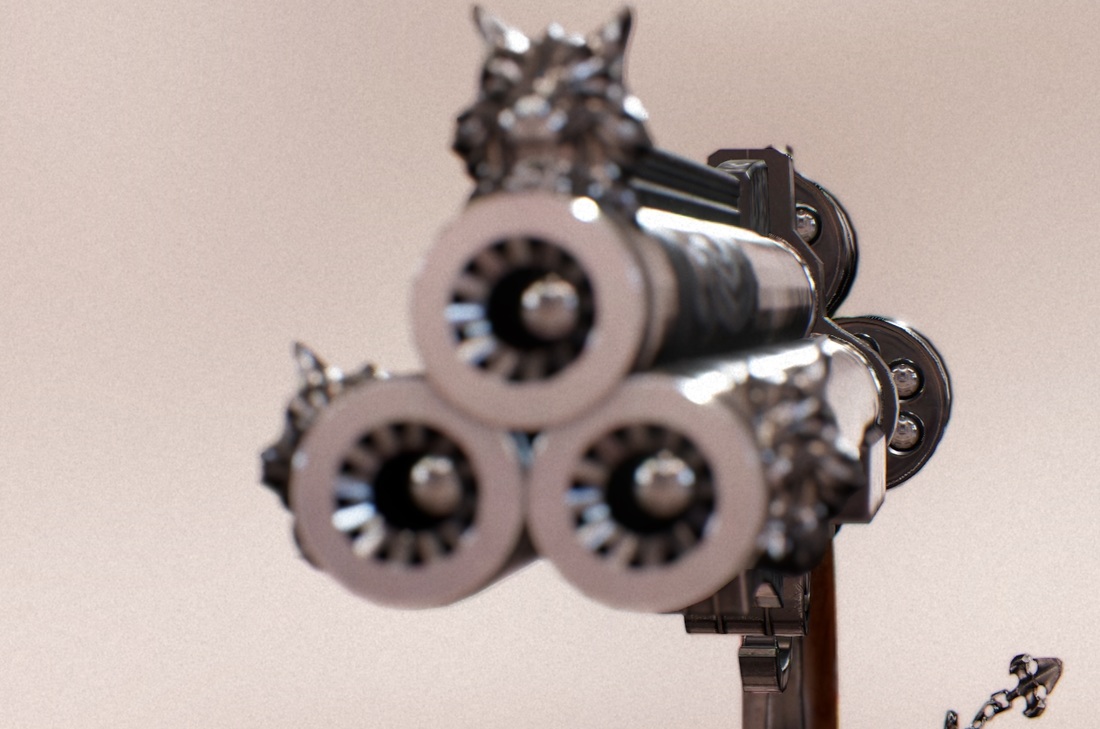 f/1.4 @ 120mm (same aperture but with a smaller focal length, you can already see the DoF is getting bigger) 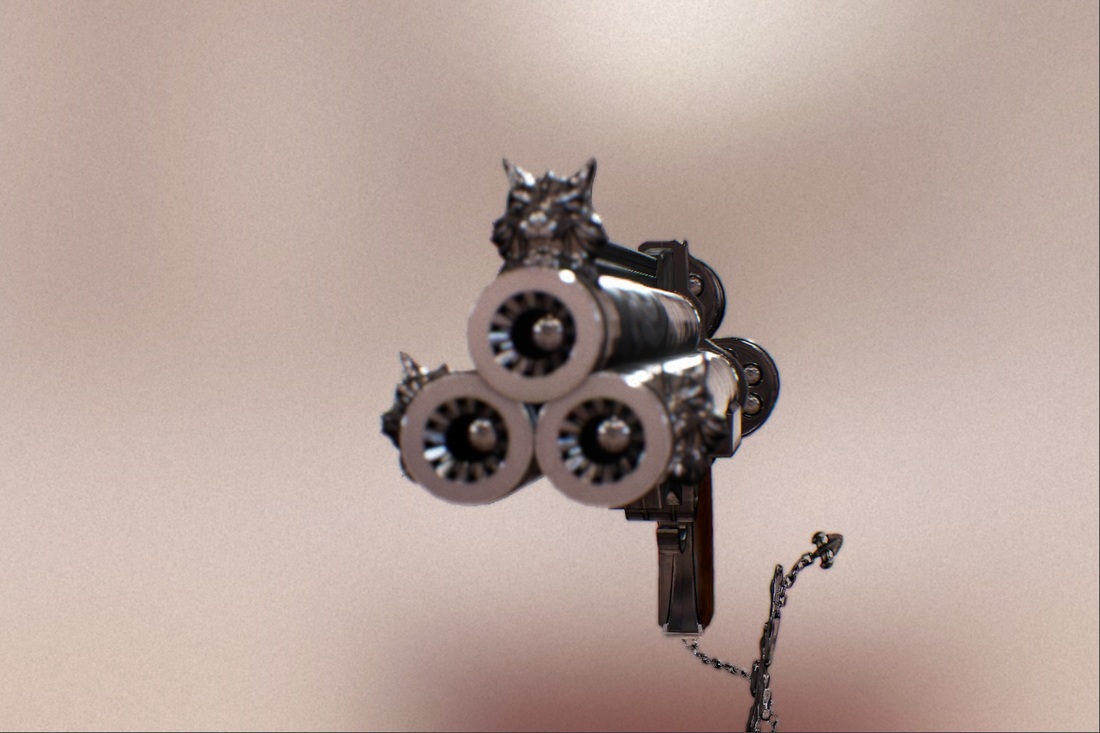 f/1.4 @ 55mm (again same aperture but with a very small focal length, you can now see that there's almost nothing out of focus and you have a very wide viewing angle) 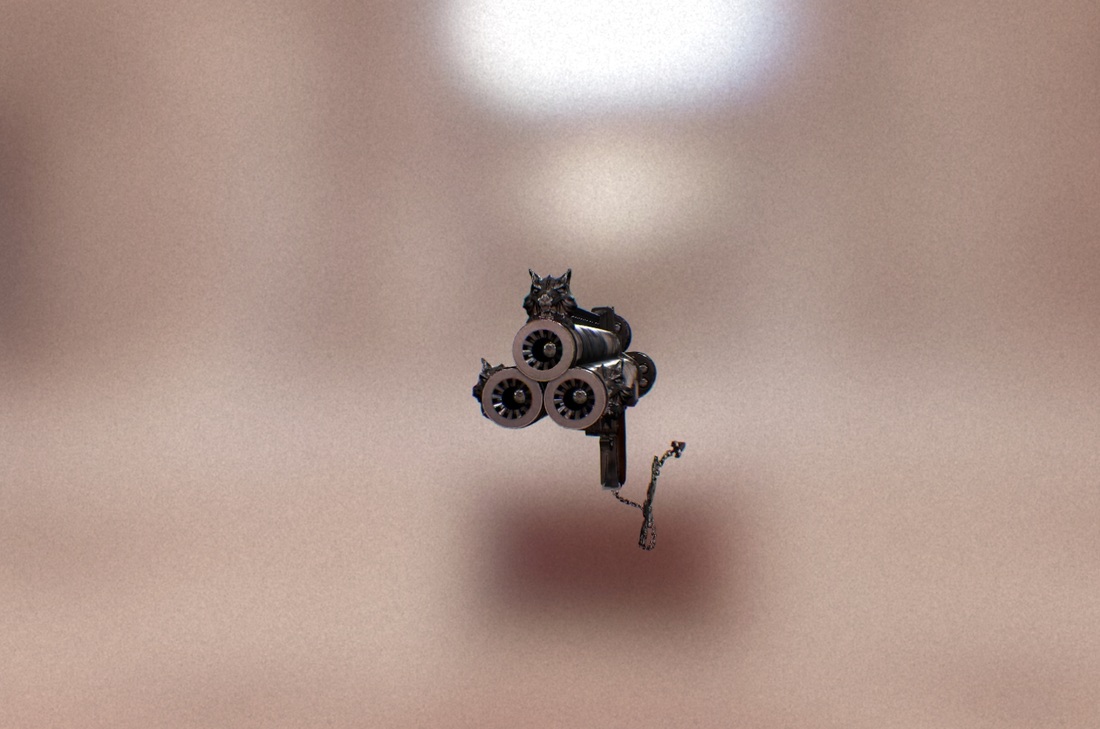 Comments are closed.
|
Archives
May 2016
AuthorA guy who's passionate about graphics programming and has fun coding engine/tools Categories |
 RSS Feed
